
How to Set FTP Quota for an FTP Account
You can easily set a quota to control and limit the FTP access to your website or individual directories. In this tutorial, I will demonstrate how you can do that from your hosting control panel using the FTP Accounts page.
FTP (File Transfer Protocol) is another access method to websites which is used for file transfer, other than HTTP (HyperText Transfer Protocol) which is the regular method of accessing and viewing a website via a web browser. In order to access a website or a specific directory using FTP, one needs an FTP account that is given permission to access to those directories on the hosting server.
If you are the only person who has FTP access to your website, you shouldn't worry much about setting an FTP quota. However, if there are other people who can access your website or server environment such as your employees, your web developer or your website users, it would be a wise decision to specify a quota limit for FTP transfers depending on the use cases.
For example, if you have provided your users with FTP access to the images folder on your website so that they can download/upload image files via an FTP client, and if you need to enforce a limit value in terms of maximum transfer value in bytes, you can accomplish that by specifying a quota for that FTP account. This quota is monitored by the ftpquota file which keeps track of the FTP usage for a specific FTP account by logging the maximum transfer size in terms of total file count and total file size.
Let's continue now with an example where we will be setting a quota for a new FTP account.
How to Set a Quota for an FTP Account
I will be using the cPanel hosting control panel for demonstration purposes but other hosting control panels which provide FTP account and quota functionality will work more or less the same.
STEP 1: Go to your hosting control panel.
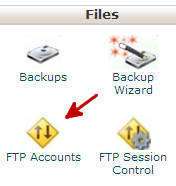
STEP 2: Find the Files section and click FTP Accounts.
This will open the FTP Accounts page where you can add new FTP accounts or edit/remove previously created ones. We will be creating a new one.
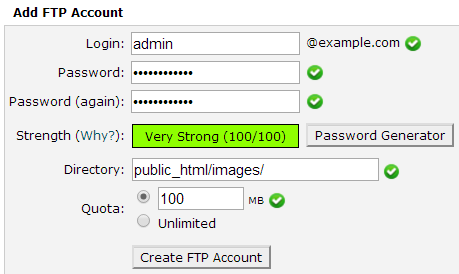
STEP 3: Enter new FTP account login username and password and also specify which directory you want to allow access to. In our example, it is the images folder.
TIP: public_html folder is the root directory of your website where all your website files are stored.
At the bottom of the form, you will see a Quota option. Specify a numeric value in MB (MegaBytes) to set the quota.
STEP 4: Click Create FTP Account button.
This will create the FTP account with the username and password you provided. It will have access to only the directory (and subdirectories) that you specified and it will have a total file transfer size quota as you entered.
The FTP user(s) who use this account to access your website, will now be able to transfer files (download + upload) within this quota limit. If this quota is reached during a single file transfer process, the user will not be able to continue transferring files to or from your site. The FTP client will give the following error in that case:
552 Quota exceeded: [file_name] won't be saved
How to Change the Quota of an FTP Account
You can change the quota for an FTP account any time you want by going to the FTP Accounts section and finding the account you want to modify.
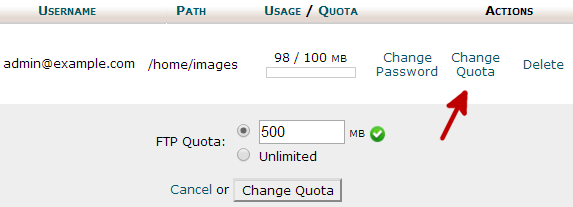
STEP 1: Find the FTP account that you want to change the quota for.
STEP 2: Click Change Quota link which will open the quota option.
STEP 3: Enter the new quota value in MB. You can also select Unlimited if you want to remove the quota totally.
STEP 4: Click Change Quota button and it is done.
More Server Tips
Apache vs. Apache Lounge: Which One to Choose? Apache Localhost Loading Very Slow: Here is the Solution How to Install Apache HTTP Server on Windows: The Apache Lounge Version How to Install Apache HTTP Server on Windows How to Check If cURL is Enabled on Your Server What is the Use of .ftpquota File? How to Prevent Search Engines from Indexing Your Pages and Files
Server Tips